Live Maps Review [First Look]
I was snooping around the Microsoft site when I accidentally came across Virtual Earth Beta which is Microsoft’s alternative to Google Earth, while I was reading about Virtual Earth I stumbled upon Microsoft’s Live Maps, now coming across this I forgot all about Virtual Earth and started checking out this online Mapping service.
The Apparatus:
-
Firefox & IE 7
-
128 kbps Internet Conx.
Now before I talk about the service let me tell you that I felt that it was pretty good on my 128kbps connection and tried it on both IE7 & Firefox 2.0.0.11 – the only problem was that some icons seemed to be broken on Firefox (I have removed Opera from my machine in protest of their – “We cant beat you so we will sue you” attitude)
So lets begin …
Presenting Live Maps (Beta):
This is what maps.live.com looks like (It will find your present country and show it)

You can see 3 options in right navigation pane – these are the basic features that Live Maps has to offer (please note the best is for later; I’m not mentioning it till I get there)
-
Search The Map
-
Get Directions
-
Explore
First – The Globe u see at the bottom left of the map which looks like as shown below fills up to indicate loading so wait and let it completely color itself

As u see it is white at the top which means it is loading
Search The Map:

Select ‘Locations’ from the 4 options below the search field and punch in the name of any location you want to search and hit search and this is what you get on the right:
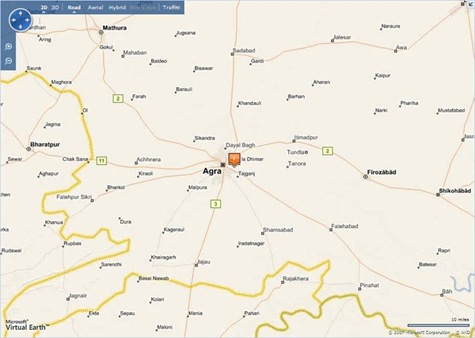 The map that you see is in 2D; you have the option to see it in 3D but 3D does not mean that you will get to see the buildings (which I think is possible in Virtual Earth – havent tried it yet so wait for another pre-view into Virtual Earth)
Let us for example take the recent winner of The New Seven Wonders of World poll – The Taj Mahal (I like that place personally) and India’s capital – New Delhi
So we click on Directions
![]()
and as a result our left pane becomes something like this:

We fill in our Start & End destinations; choose the route options – Shortest Route or Shortest Distance and select whether you want the route to include the traffic as a variable (thoug I doubt it will work in India as the route you expect not to be filled with trafficwill always have cars bumper to bumper)
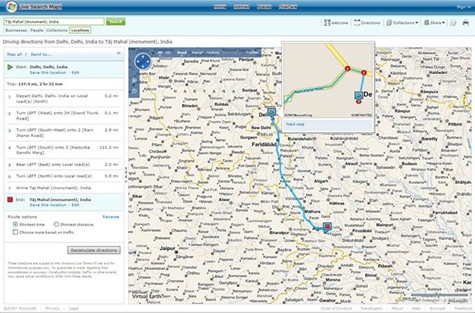
Once you select your options and hit Get Directions, this is what you get on the left:
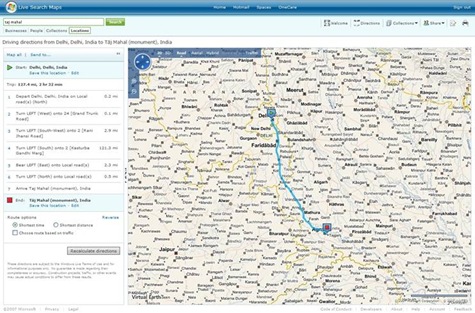
So u can see the route that u need to follow to reach your destination, yes u can zoom in and also to get a closer look.
While the map is on the right the left pane now looks something like this:

The above map shows the route based on the Shortest Time option, if u select Shortest Distance from the left side pane – this is what you will get:
Map Tools:

The options in the blue band form the Map tools which you can use to have a better look at the map:
-
Zoom In
-
Zoom Out
-
2D View – All above map screenshots are in 2D
-
3D View – Talked about later
5. Road – This is how the road layout looks like (All above screenshots show the map based on the Road layout)
![clip_image008[1]](https://beingmanan.com/wp/wp-content/uploads/2008/04/clip-image0081.jpg)
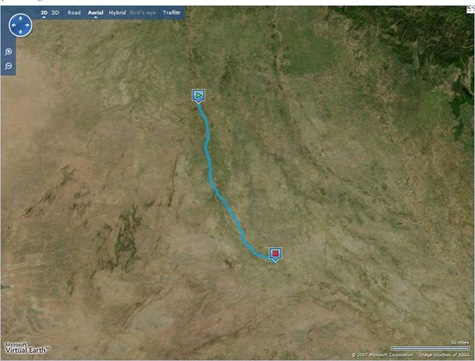
6. Aerial – If you choose this option this is how the same map looks like
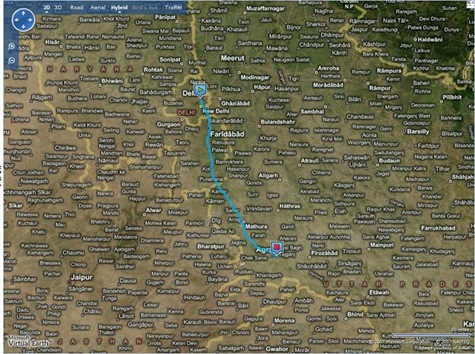
7. Hybrid – This is a mix of the Road & Aerial View which results in something like this:
8. Traffic
If you want to hide these tools u can click next to the Traffic option:

Which results in:

Click on the arrow pointing right to bring back the tools.
Once you searched for directions and you the them displayed on the right u have 2 points namely the start and end with a green play button and a red stop button respectively; here is something really cool:
Take your mouse on either of the points and this what u get:
It has an auto zoom in feature showing the road way from that location towards your destination.

Look closely at the zoomed image – what you see is a number at every turn and if u see u have a ‘Next Step’ & ‘Previous Step’ option; if u keep clicking on the ‘Next Step’ option it will keep on showing you the corresponding location on the map – How cool is that?
Save Location:

I liked this nice little handy option of allowing you to save the location for further reference and ease of ue for next search; you can save the location under 3 categories:
-
Home
-
Work
-
Other
It comes in handy for you to use the ‘to and from’
Here is how:
For example I saved Delhi as ‘Other’ and when I go to enter a search criteria the drop down shows me this:

Now comes my personal favorite option of Live Maps:
Collections:

Select ‘Add a Pushpin’ and you will get a menu like this:

Fill in the details; choose a photo url or upload 1 from your pc itself; make some notes & click save which will give you this:

If you see a yellow bar (which on any live site means – please move ur butt) so now let us save the collection:
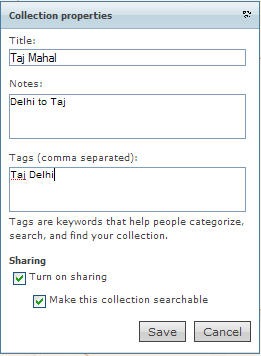
Again quite a bit of options available – wether you want to give some tags or whether you want to share and make the collection searchable (keep in mind ur wife might find ur mistress’ road way if ur not careful)
Now that we have saved the Collection lets see how the whole window looks like:

So let us break it down to see what is what:
This is the collection editor window displaying the saved collections and some other options it has –
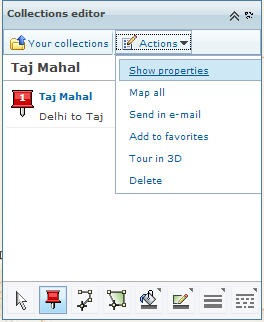
- Send in eMail
- See properties
- Add to Favorites etc
If u see at the bottom you have 8 options available which are:
![]()
- Pan, Zoom, Tilt
- Add Pushpin
- Draw Path or Trail on Map
- Mark an area on the map
- Set the fill color
- Set the line color
- Set the line width
- Set the line dash style
Please note that all these features are seriously very cool to use as they make ur job marking your path; location; area on the map very easy to do and understand – and marking these areas on a map comes in handy more often than not as it will tell u the total distance covered etc.
Here is what happens when u mark an area on the map:
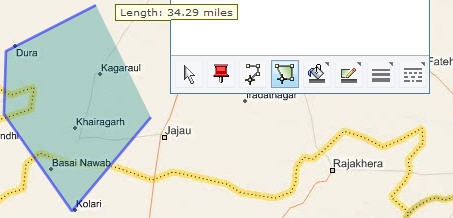
You can change the color; the border everything from the toolbar – Cool aint it?
The collection editor window can be either not shown at all or it can minimized to be like this:

This was the Collection editor window now lets move to the left pane:

Again you the options to save the location; add it to collection or email it.
But the fun part is the link below in bold:
Explore Collections – This is what happens when u click it:
I searched for Delhi and clicked on Explore Collection and behold what is shows u:

It shows u the places to visit in Delhi with their locations on the map by numbering and also information about those locations and links to more info and also just to mention these are locations marked and submitted by users – The WoW starts now!!!
Well that was a tour of how u can use Live Maps but wait its not over …
What I showed u was all in 2D; here is 3D:
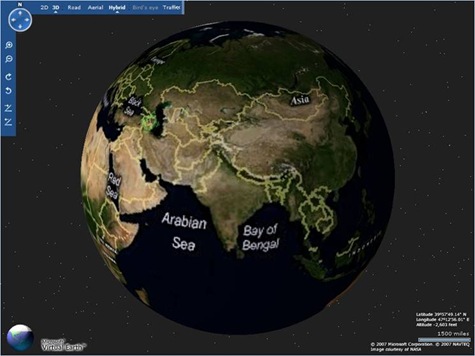
When u choose 3D view from map tools discussed above and shown below:
![clip_image014[1]](https://beingmanan.com/wp/wp-content/uploads/2008/04/clip-image0141.jpg)
You will be greeted with a window like this:


So u get to choose based upon ur judgement as to what will suit ur net connection best – u have 3 options for the 3D view:
- Performance
- Balanced
- Quality
You will also get a pop-up that tells how to use the 3D view:

So now ur into the 3D view first thing to tell u:
The Toolbar – It now gets some new options:

- Zoom In
- Zoom Out
- Rotate the Camera Angle Clockwise
- Rotate the Camera Angle Anti-Clockwise
- Tilt Down
- Tilt Up
Options are self explanatory and make 3D browsing a fun experience.
Now we go back to the main window and see what all other small yet very handy and useful options we have:
![]()
- Welcome – Kinda Home link for Live Maps
- Directions – Explained above
- Collections – Explained above
- Share – Allows u to share the maps with others

U can blog it or even mail it handy as I said.
5. Options :

Pretty much self explanatory
The option of 3D settings brings up this menu:

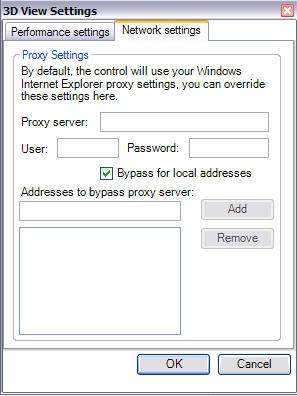
6. Print

With this I end this little review showing u the various options and features available in Live Maps; have a nice day & if ur lost use Live Maps to find ur way back.